4 or 5 dissecting equipment such as Kelly curved clamps or artery forceps
Strong nonabsorbable sutures of size 1.0 or greater made of silk or nylon
Chest tube of appropriate size
Stable patient: 16 to 22 french
Chronic lung disease, on mechanical ventilation or risk of large air leak: 24 to 28 french
Pleural drainage system
Petroleum based and regular gauze dressings
Method
Open and prepare equipment
Clamp the distal end of the chest tube
With another pair of forceps clasp the distal end of the chest tube
Position the patient: ipsilateral hand behind the patient’s head
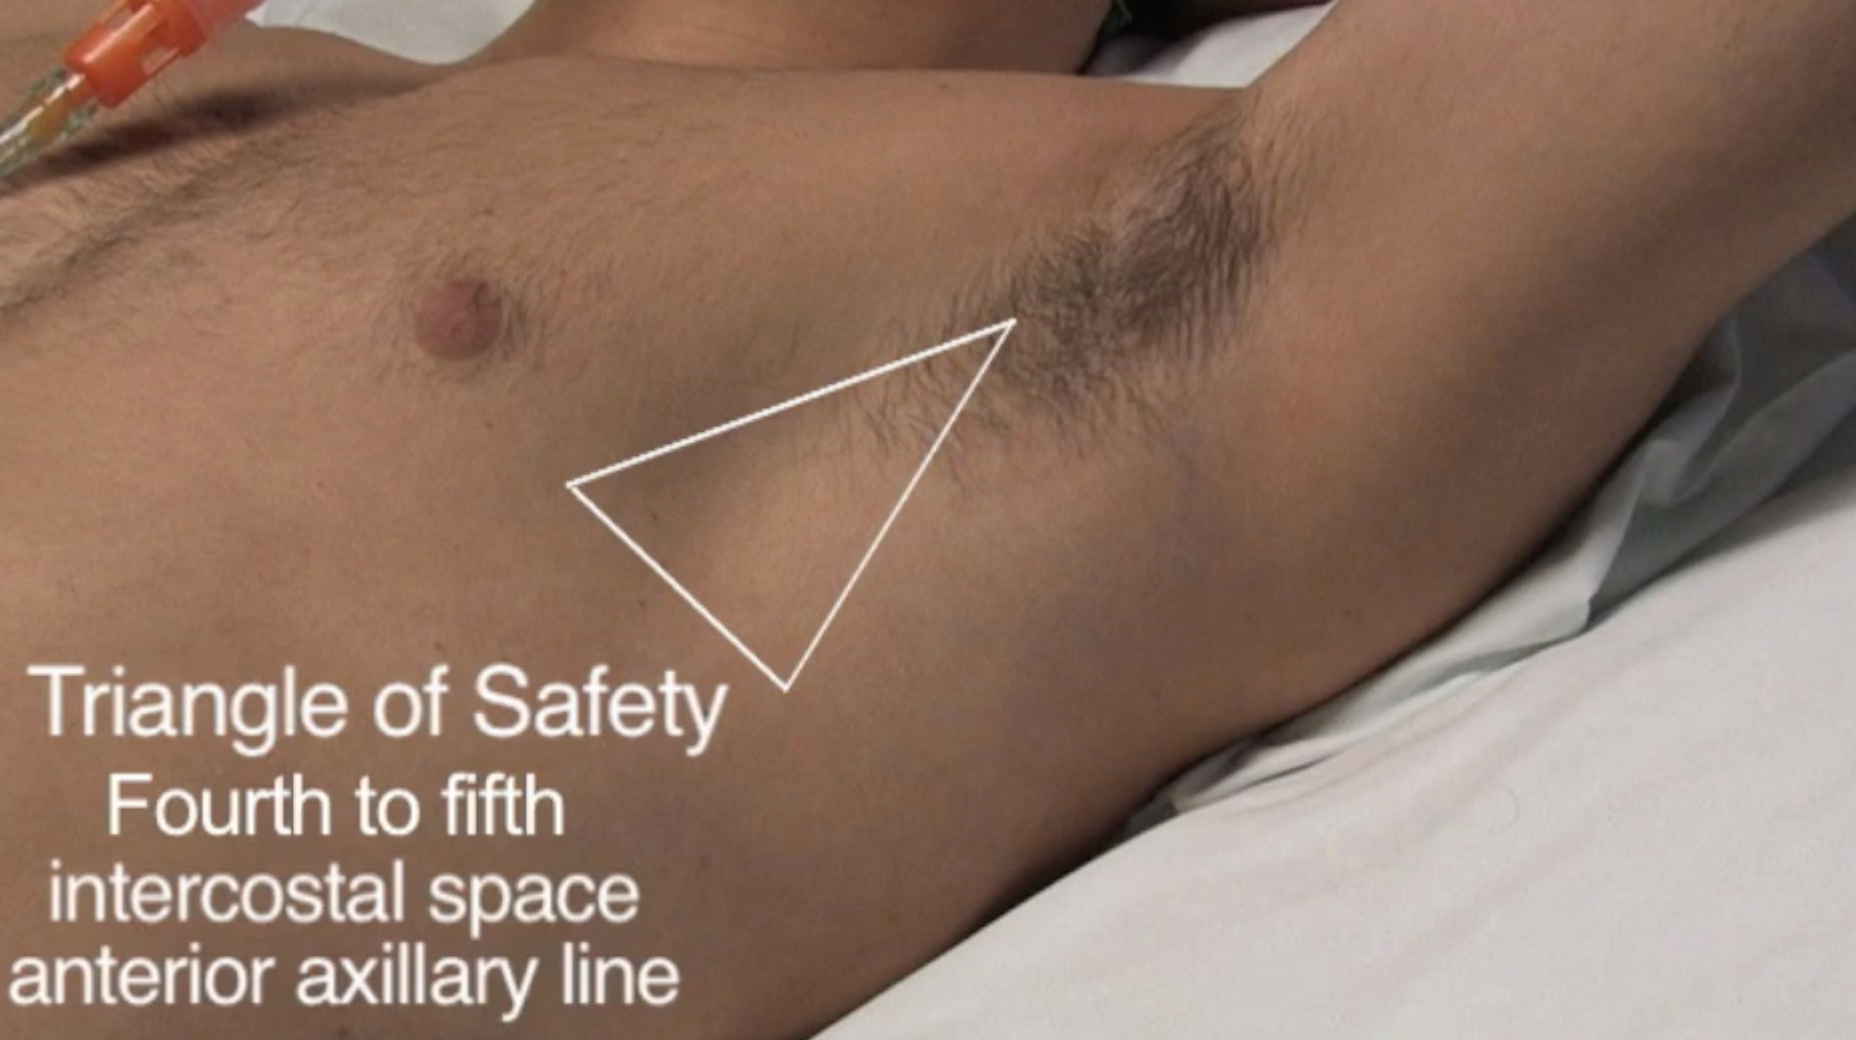
Identify triangle of safety
Localise the clavicle
Count rib numbers when going down the anterior chest wall
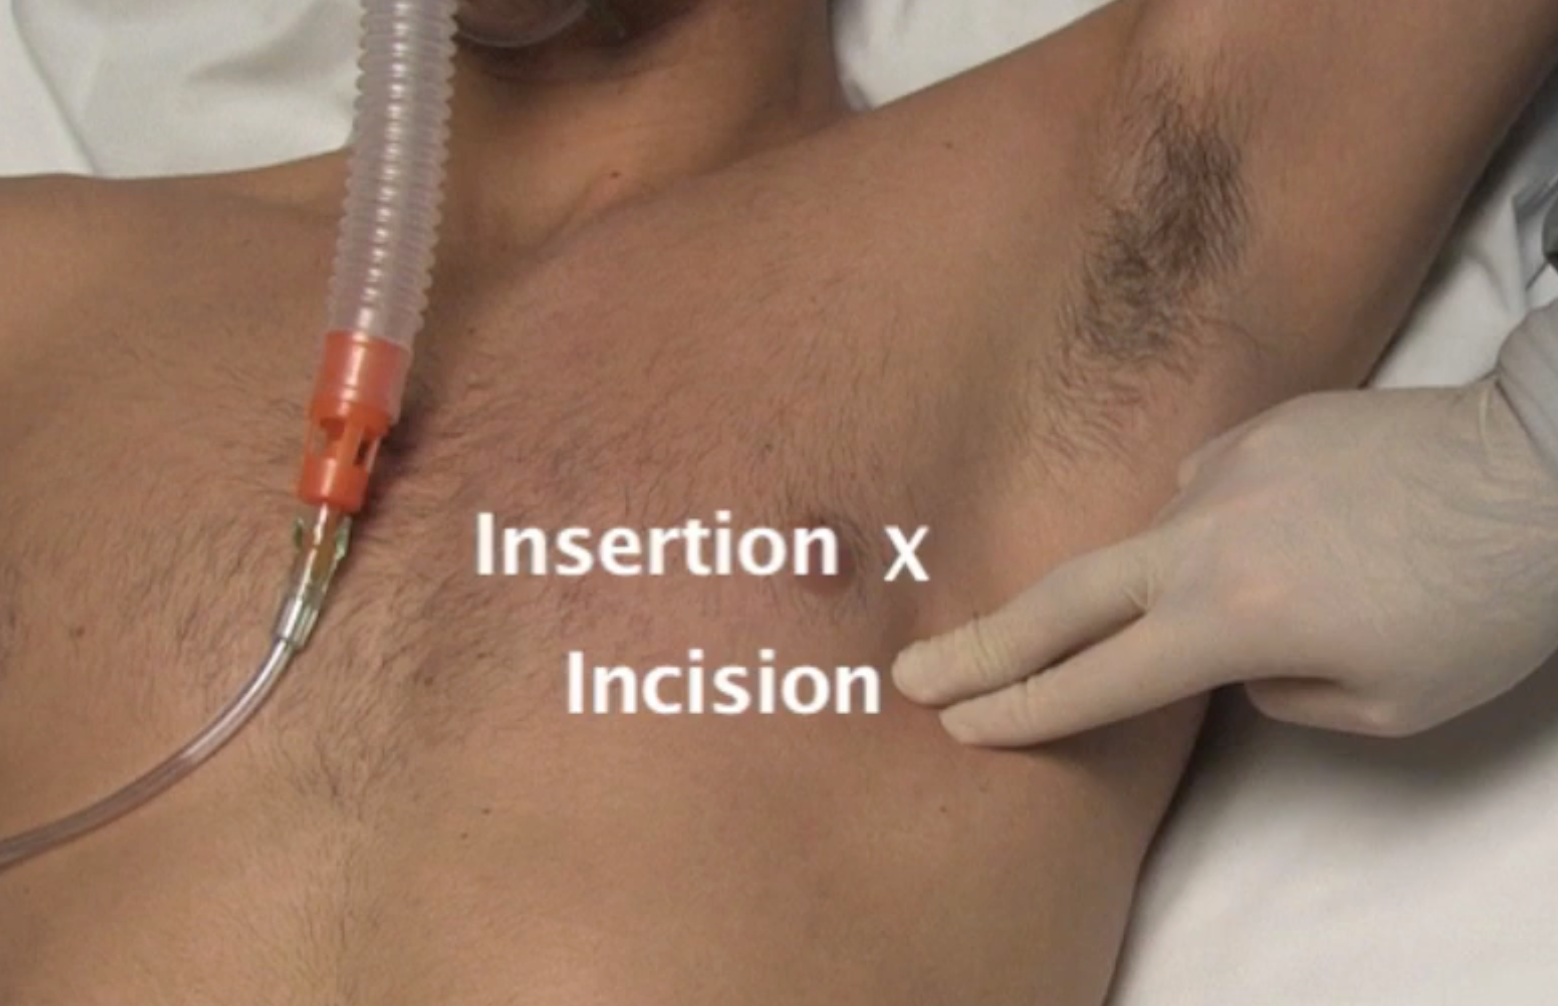
Once finding the fourth and fifth intercostal space move laterally towards the anterior axillary line; this will be the site of incision, but the chest tube will be inserted one interspace higher
Mark the incision point with a pen marker
Apply sterile gown
Clean area
Cover with sterile drapes
Generously anaesthetise skin, deeper tissues, parietal pleura and periosteal surface of the rib below the insertion site
Make an incision 1.5-2 cm above and parallel to the anaesthetised rib
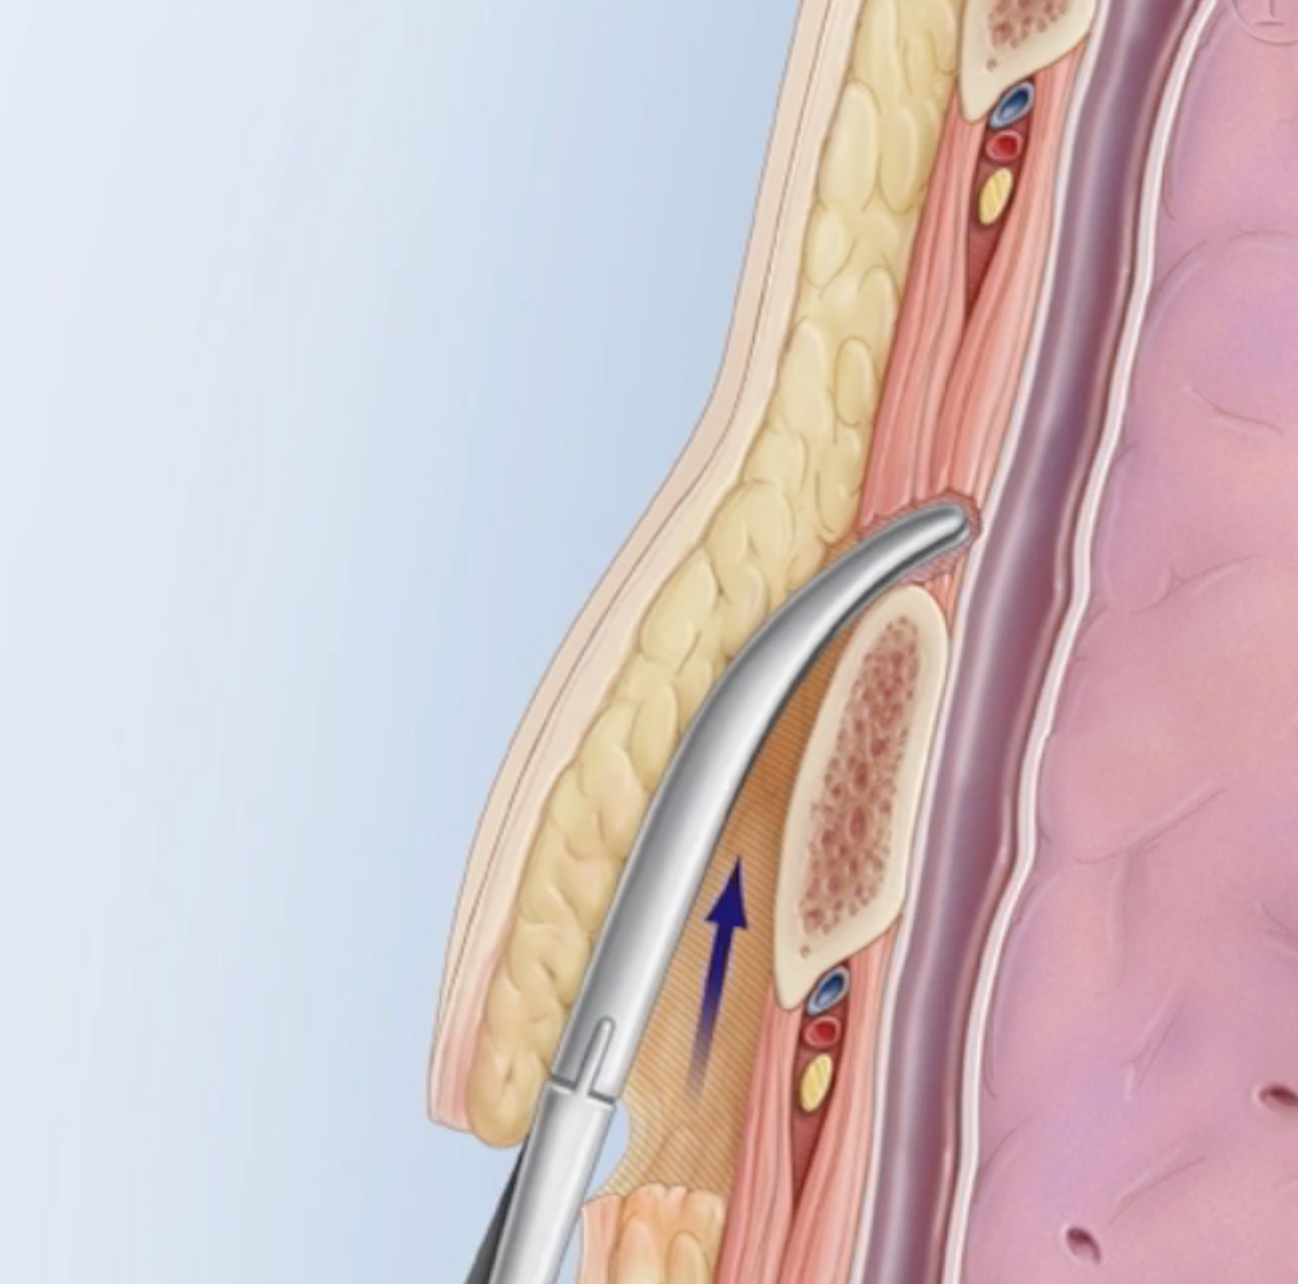
Use a dissecting tool (e.g. Kelly clamp) to dissect the subcutaneous tissue
Stay on top of the rib to guide the blunt dissection
Gently push the clamp into the parietal pleura or use your finger
Ensure the lung is not adherent to the pleura, some pleural fluid should trickle out
Place the tube through (using the initially distal clamp) as a guide with your finger
If meant to drain a pneumothorax, aim apically or if meant to drain fluid aim basally
Make note of the depth of tube insertion based off the numerical markings on the side
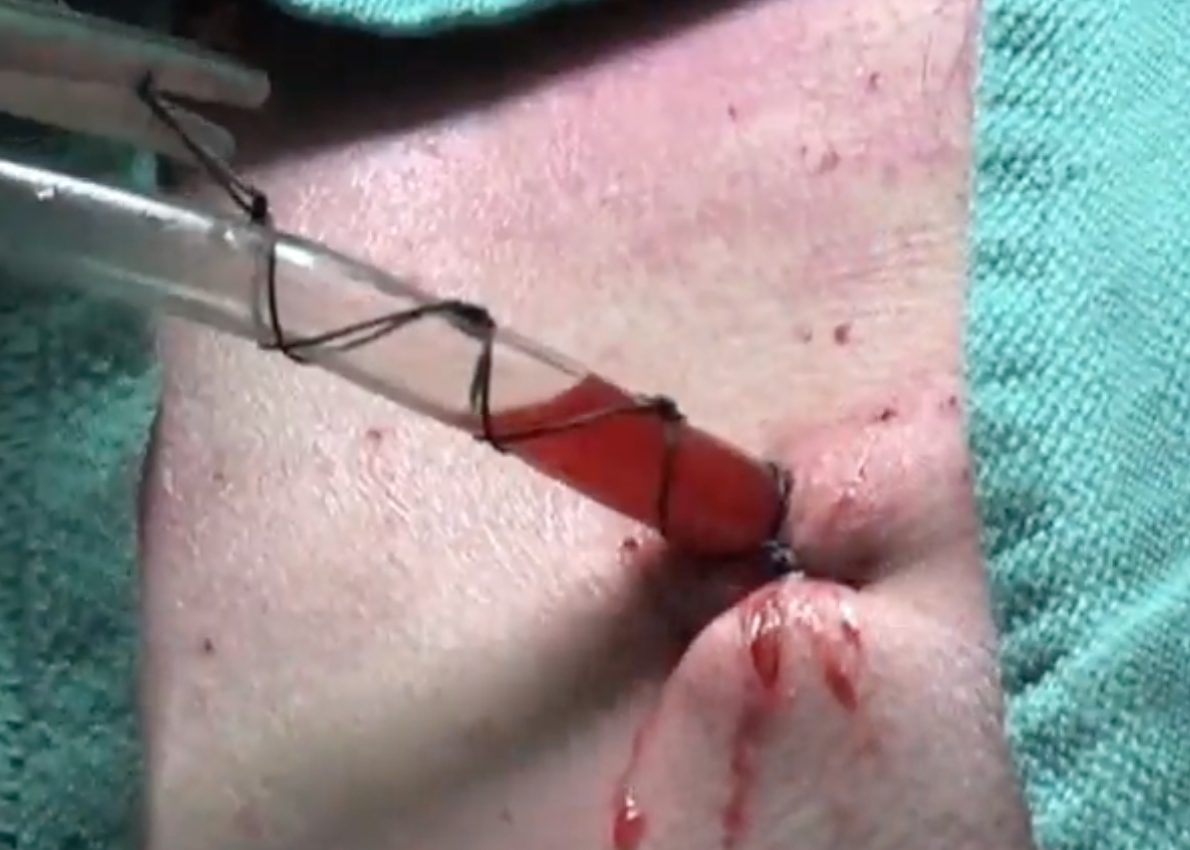
Suture the tube by wrapping the suture around the tube
Apply a petroleum based gauze dressing around the tube
Apply multiple sterile dressings
Obtain a post-insertion chest X-ray
Connect to the drainage system
Unclamp the distal end of the drain; if pneumothorax air bubbles should appear in the pleural drain otherwise if pleural fluid is being drained, pleural fluid should appear int he drain
Keep the pleural drainage system at least 100cm below the patient